

How To Sew a Mattress Seam
Tired of seams ruining the look of your work? Fear not! We’ve put together a little tutorial on how to do the perfect invisible seam. Follow our step-by-step guide and you’ll be a master in no time.
@qingfibre Woohoo!! Time to learn how to sew up a mattress seam! Hope my little video helped!! Hit the comments if you have any questions 🥰🥰 #knittok #sewing #seam #finishingtouches #knitdyedesign ♬ Blue Moon - Muspace Lofi
What Is a Mattress Seam?
Sewing an invisible mattress seam in knitted fabric is a technique used to join two pieces of knitting together seamlessly. Whether you're working on a sweater, scarf, or any other knitted project, this method will help you achieve a clean and professional finish.
In this tutorial, we will guide you through the steps to sew an invisible mattress seam in knitted fabric. This is an ideal seaming technique for many projects; including our free Moon Bunny pattern, and our Moon Cake pattern. This is a great seaming technique to have under your belt!
Required Materials:
- Knitted fabric pieces to be joined
- Yarn (we used Teddy and Big Merino Chunky)
- Tapestry needle or yarn needle
- Scissors or yarn cutter
How to Make a Mattress Seam, Step-By-Step
Step 1: Prepare the fabric pieces. Ensure that the edges you want to sew together are properly aligned. Place the fabric pieces side by side, with the right sides facing outward. Pin or use stitch markers to hold the edges in place, if necessary.

Step 2: Thread the needle. Cut a length of yarn (approximately 1.5 times the length of the seam) and thread it through the tapestry needle or yarn needle. Leave a tail at the beginning, as it will be woven in later.

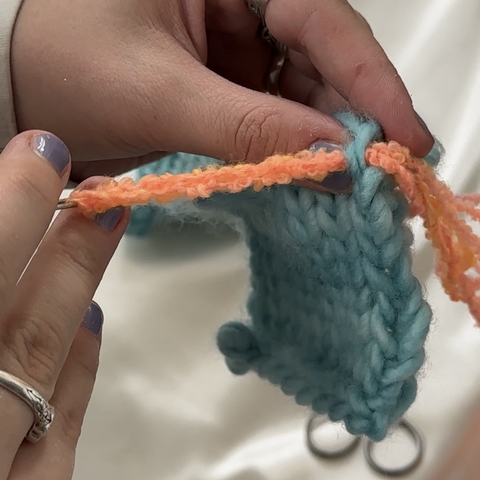
Step 3: Start sewing. Insert the needle into the first stitch of the bottom edge of one fabric piece, going from the wrong side to the right side. Pull the yarn through, leaving a small tail on the wrong side.

Step 4: Create ladder-like stitches. On the opposite fabric piece, insert the needle into the corresponding stitch, going from the right side to the wrong side. Pull the yarn through, making sure it lies flat along the seam. Repeat this process, working your way across the seam.
Step 5: Maintain tension and consistency. As you sew, make sure to maintain an even tension on the yarn. Keep the stitches as small and consistent as possible, matching the gauge of your knitting. This will help create an invisible seam.
Step 6: Secure the seam. When you reach the end of the seam, make a small stitch to secure the yarn. Insert the needle into the fabric, come out a short distance away, and pull the yarn tight. Repeat this process once or twice, and then cut the yarn, leaving a small tail.
Step 7: Weave in the ends. Using the tails left at the beginning and end of the seam, weave them using a tapestry needle or yarn needle. Carefully thread the tails through the stitches on the wrong side, going in different directions to secure them. Trim any excess yarn.
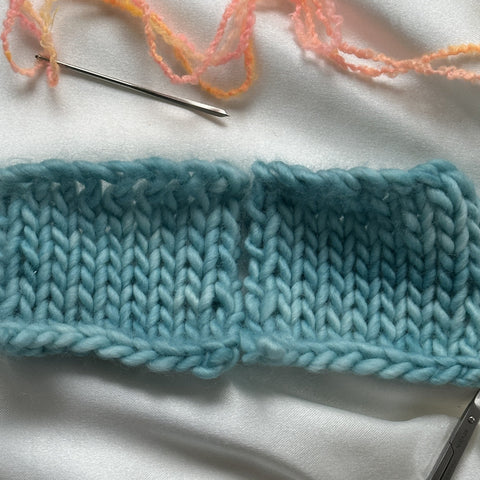
Step 8: Final touches. Inspect the seam to ensure it is well-aligned and the stitches are hidden within the fabric. Gently stretch the seam to allow the knitting to relax and blend together. You can lightly steam or block the finished piece, following the care instructions for your knitted fabric.
Mattress Seam Quick Tips
By following these steps, you can sew an invisible mattress seam in knitted fabric, creating a seamless and professional finish to your knitting projects. Head over to our Tiktok to take a look at our video guide tutorial for the mattress seam.
If you would like to copy our tutorial like-for-like, or just fancy the yarn we're using, check out the Big Merino Chunky base. Remember to take your time, maintain consistency, and enjoy the satisfaction of a beautifully joined knitted piece. Happy knitting!
Enjoyed this read? Check out more tricks, tips and techniques in our blogs.