

Although popularised in the '70s, macramé is one of the most ancient forms of textile crafts! Using knots to create decorative items and wall hangings, It is wrapped in a rich history and has experienced various revivals, remaining popular as a DIY craft today.
@qingfibre hey! heres a tutorial on how i used a single crochet method to macrame with yarn??? This is our wensleyhaze base ! #knittok #crochettok #macrame ♬ Birds - Muspace Lofi
Macramé projects can range from delicate and ornamental pieces to robust and functional items like the plant pot holder we are crafting today. If your aim is to create more decorative pieces, opting for thinner yarn allows you to fashion more intricate knots. However, for everyday functional pieces like the one we're making here, we recommend using layered yarn or chunkier yarn for the best results.
What Materials Can You Use To Macramé
In addition to yarn, other commonly used materials for macramé projects are rope, cord, string, or waxed threads. Ropes and cords are more suitable for larger projects, while yarn and string is better suited for smaller, decorative items.
Functional Macramé Projects
When working with yarn for macrame, cotton yarn is generally considered the optimal choice, particularly for creating sturdy pieces due to its smooth look and ability to knot and hold well.
Wearable Macramé Projects
For warm clothing garments, wool yarn is a good option, as it’s breathable and soft, allowing for a cosy piece of clothing.
Decorative Macramé Projects
Acrylic or polyester yarn is suitable for making toys or decor as it can create small, tight stitches and knots with a smooth look.
Versatile Techniques
The square knot technique we are exploring today can be applied to fashion various other items, such as wall hangings, bags or water bottle holders, earrings or necklaces, and even purses.
Get ready to create a beautiful crochet macramé plant holder with this tutorial...
You Will Need:
- Crochet hook
- Yarn
- Scissors
- Ring (optional, of any description)
Preparing The Macramé Cords
Step 1: To start, select four strands of yarn. I chose two strands of Wensleyhaze in Mandrake, and two strands of Wensleyhaze in Utopia. Cut out 8 of your 4 strand gathering, each measuring 10 to 20 feet, depending on the size of your plant.
Please note: if your yarn is chunky or thick already, you may only need to pull out one or two strands.

Step 2: Now, crochet each set of four strands together using a single crochet technique. This will prevent the yarn from getting tangled and ensure a strong cord. After crocheting, you should have eight sturdy cords ready.

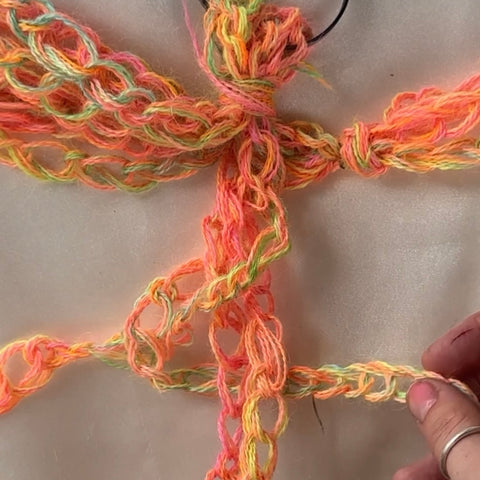
Step 3: It's time to move on to the macramé part. If you're using a ring, place your cords evenly over it. Then, create a 'wrapped knot' to secure the cords in place. To create this knot - take another four strands of yarn, wrap them around the cords underneath the ring or starting fold, and bunch them together. Secure the wrapped knot by tucking in the extra strands.

Step 4: Next, divide the 16 cords into four sections of four cords each. Work on these sections one by one. Let's begin with the square knot...

How To Work a Square Knot
Step 1: Take the left cord, lay it over the centre cords, and pass it under the cord to the right.

Thread the right cord under the centre cords and up over the cord on the left. Pull it tight, aligning the knot with your desired mark.

Repeat the process in the opposite direction: lay the right cord over the centre cords and under the cord to the left. Thread the left cord under the centre cords and up over the cord on the right.
Pull it tight to create a square knot.
Repeat the steps to make two square knots.
Step 2: Now, create another row of square knots slightly below the first row. These knots will be made using new groups of four strands. For each knot, take two cords from adjacent groups of four - one centre cord and one right cord from one group, and one centre cord and one left cord from the other group.

Decide how far below the previous row of knots you want these next knots to be, and make the knots accordingly. For instance, you can keep them a few centimetres below the first row if your plant is small, or leave a larger gap if it’s a bigger plant.

Step 3: To complete your DIY macramé plant hanger, tie all the cords together with one final knot. Choose a position below the second row of knots where you want the final knot to be.
Loop all the cords together and pull through to tighten and secure the knot. Finally, trim the cords to even out the ends.
Master The Square Knot
Macramé might take some getting used to, but once you've mastered the square knot, it becomes incredibly simple and repetitive. You can use this technique as many times as you want, depending on the desired appearance of your pot holder.
Now you've successfully crafted your crochet macramé plant holder! It's ready to display your lovely plant in style! If you’d like a more in depth and visual tutorial, head over to our TikTok!
Enjoyed this read? Check out more tips and tricks in our other blogs.